_Click Here to Return to the Previous Page
This Swap is being performed in a 5th Gen 95 Civic DX coupe.
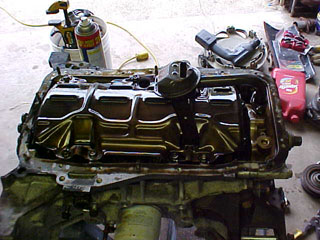
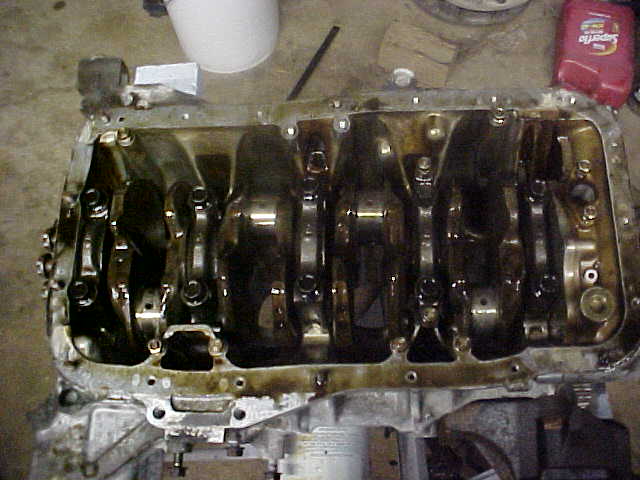
As a recap of page two i removed the oil pan. After lifting the pan i suggest using a puddy knife to lift the old gasket.
You will want to replace all the gaskets that you are taking off. Especially the head gasket. Here's what you will be looking
at after you take the oil pan off the engine.
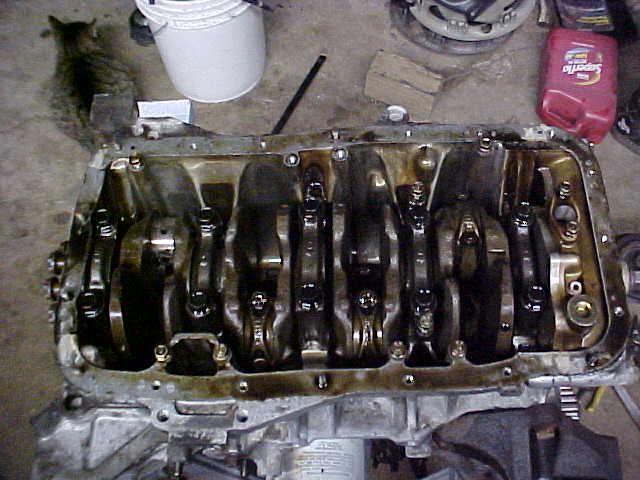
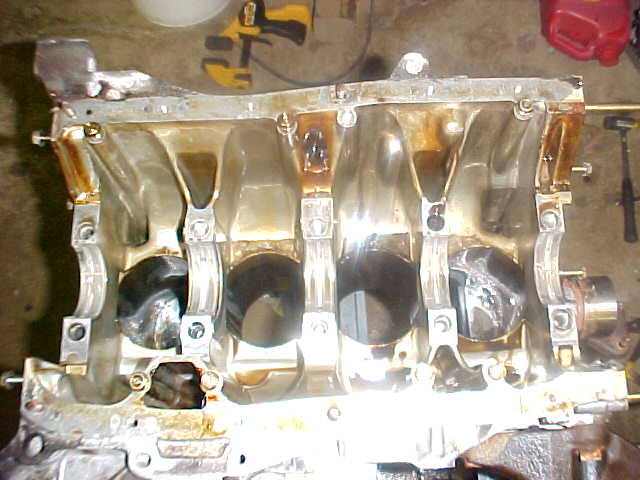
The Next step will be removing part of the oil pump. It's the thing you see that sticks
up in the image. It's held on by three 10mm Bolts. After removing that you will need to unbolt the blatter plate.
It is the large metal plate that covers the access to the crank. After removing those peices you will now have access
to the crank. And you will be looking at something similar to this.
Now we will be removing the Connecting Rods and bearings. Then we will slide the pistons out of the cylinders. Start by
loosening each bolt that holds the connecting rod onto the crank about 1/4 turn untill you can loosen them by hand. This is
a very important thing to do. Make sure all the parts go back on the same rod that you take out with. Unless you plan on replacing
the rods. After taking the nuts off the rods you will need to pull the peice off the crank so the pistons are free from it. If you can't pull
them off use a rubber hammer and slightly tap on it to get it to break loose. Now remove it. Be carefull not to drop the bearings.
(the bearings aren't like your typical bearings. It is a slider style bearing.) It is now time to slide the piston out from the cylinder.
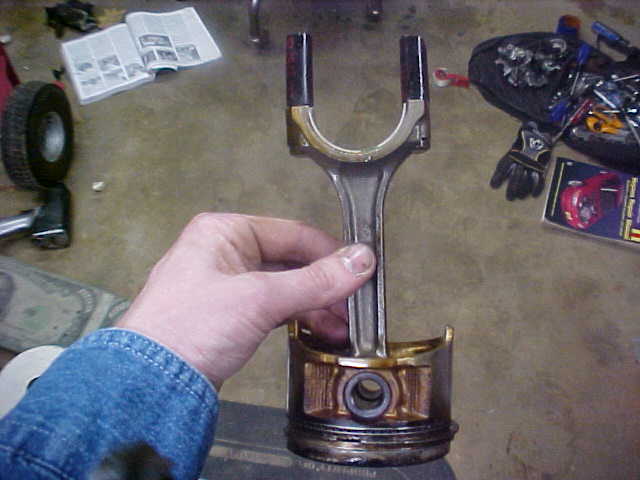
Before you do so, cut yourself some rubber hose and slide it over the connecting rod ends to protect it from scraping the walls of
the cylinder when you slide them out. In the picture below you can see how i put the rubber hose onto the rods before i slid them out.
You will repeat this step for each cylinder, untill all 4 pistons are out.

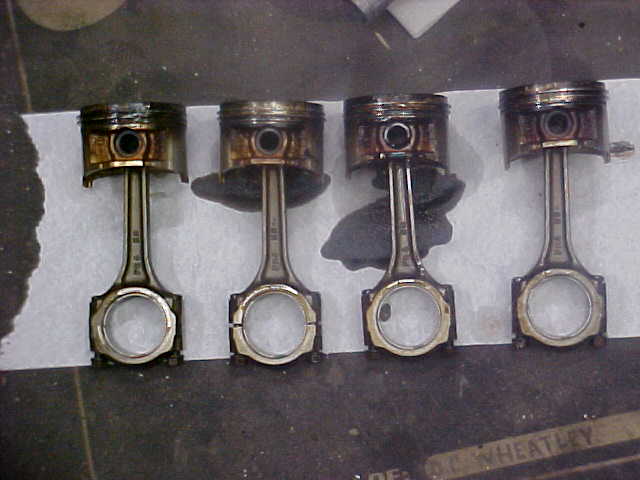
After removing all the pistons you should set them someplace safe. Your pistons should look similar to the ones in the picture below.
These are the condition of the pistons/rings and connecting rods. I thoroughly inspected each piston. Every piston and ring checked
out fine except for one. On cylinder 2, the Compression ring was broken. The peice was no where to find. Which lead me to believe
that the engine must have crushed it up. So i went and inspected every cylinder to check for any damage that could have been caused
when the ring broke. Luckily there was nothing severe enough to damage the cylinder walls. A simple honing job will remove all the light
scratches. The fact the pistons where in bad shape doesn't concern me since i will be replacing it all.
Ok The last item remaining in this block would be
the crank So lets remove it!
. This is really easy to take off. You will need
to remove the rest of the oil pump on the pulley side
of the crank. It' might look like it's part of the
block but it's not. Unbolt it . If it doesn't want
to come apart from the block you can use a rubber
hammer to tap on it untill it releases it self. Now
it's time to take the flywheel side of the block apart.
It comes apart almost the same way as taking the oil
pump side off. Once that is removed it is now time
to unbolt the crank holders. Start on one end of the
engine and work your way over to the other side. Turn
each bolt roughly 1/4 turn untill you can remove them
with your fingers. To release the holders from the
crank lift the bolts up some and tap them with the
rubber hammer to break it loose, but be carefull not
to drop the slider bearing. Keeping all the bolts
with each holder is important. Do not mix them up
if possible. The reason for this is because they are
worn into that peice. It would be like wearing somone
elses shoes. You can feel where there toes have been
in the shoes and they get the shape of there feet,
not yours. Rinse and Repeat that method for each crank
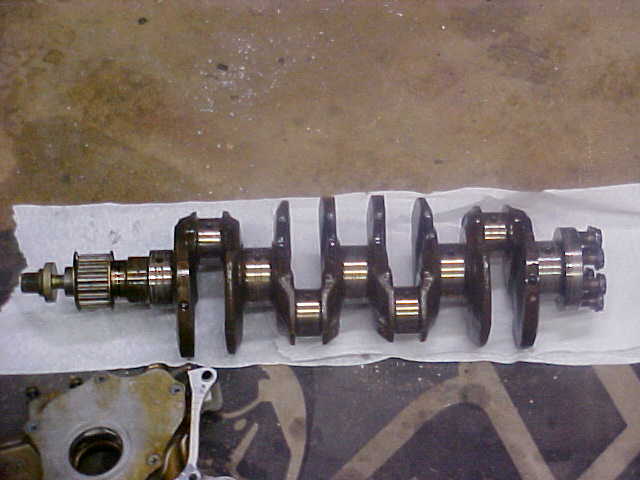
holder. After removing the holders the crank should
be home free to lift out. It is quite heavy so be
carefull not to drop it. After you take the crank
out you will see two 1/2 moon style brackets that
go up against the crank bearing on the cylinder closest
to the flywheel. Be carefull that they do not fall
out. This is what you should be looking at after removing
the crank. (looking at the image below, if you look
closely you can see where the 1/2 moon brackets are.
They are against the second crank bearing location)
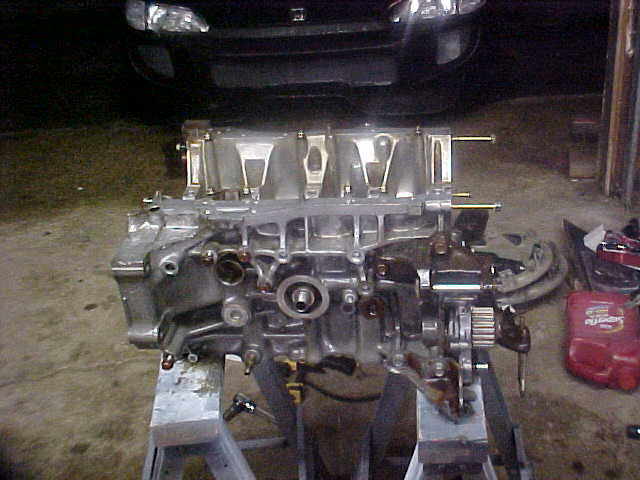
Now that we have stripped almost everything on the block (except the water pump.) I think it's time to clean it up some. On my block i have alot of corrosion on the
outside. Hardly any cleaner can remove this corrosion. If you are lucky you can get your engine acid dipped to try to remove it. Although i'm doing this by hand to
show everyone just how easy it is. The corrosion looks like a white film on the block, it is in patches. I use a tiny wire brush. The brush looks like a toothbrush but is even
smaller with very fine bristles. It works great to remove it. It can take alot of time and patience to get it all off but it is well worth it in the end. Here's what the block now looks
like after i spent minimal time cleaning it. We are no where near satisfied with how clean the block is but this will do for the time i had tonight.
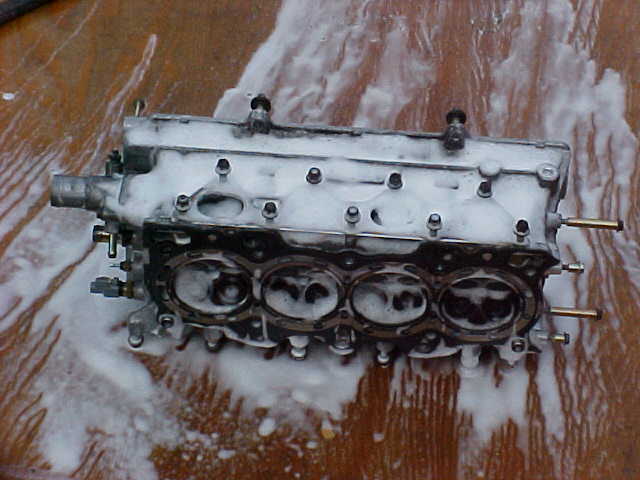
We will now clean the rest of the parts we took off the block. Starting with the Cylinder head. Get yourself some engine degreaser from your local Wal-Mart
Or auto parts store. Preferably i would go to walmart , you can find cans of degreaser for 78 cents a peice. I would pick up about 4 cans for the Entire Cleaning process.
Take your cylinder head outside near your hose. Spray it down with degreaser and let it sit for about 5 minutes for the cleaner to break down the dirt/oil. I also used a old
toothbrush to help get into tight areas. After you scrub the head down with degreaser it's time to rinse it off. Just spray it with your hose. Or if you have a pressure washer
you can get even more dirt and grime off. ( I used a pressure washer, but a hose will do fine)
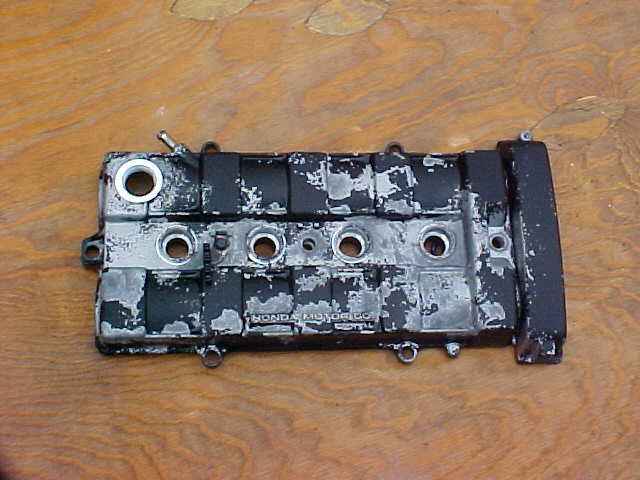
Now that the cylinder head, and block is clean. I decided to clean up the valve cover. But since the valve cover was in pretty rough shape, (the paint was chipping off it )
I decided that it would compliment the swap with a nice new paint job on the valve cover. So i sprayed it down with Automotive Paint Stripper, and let it sit for a few minutes
then sprayed it off. In the picture below you will see how it started removing all the paint. I ran out of the paint stripper so i didn't get to take all of the paint off the valve cover
just yet. You could always use a sandblaster to remove the paint also. While i was at it i also cleaned up the oil pan
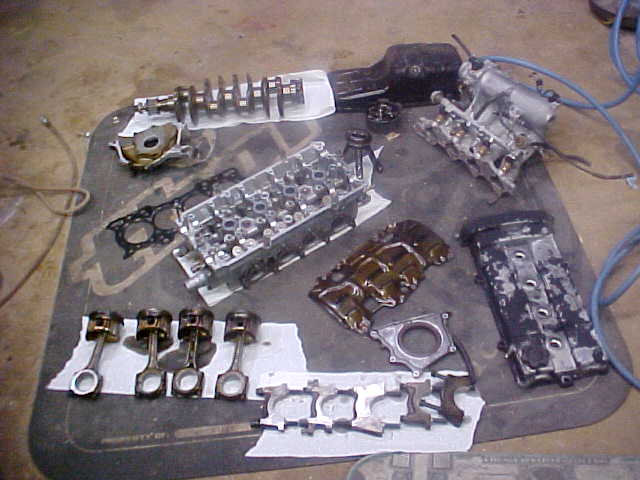
We are now done Stripping the motor down. The next steps to follow will be rebuilding the engine with the new Pistons, Rods, Rings. Then we will be doing the head work
and replacing all the valves/springs and retainers. Then i will be working on the intake.
Here is a image of all the engine parts that where removed.
I'll be updating this section frequently. The next update will include more block cleaning procedures, And the start of the engine
Rebuild and honing the cylinders.
Remeber to Spray down your engine parts with a lubricant after getting them wet when washing
or be sure to blow them down with a aircompressor to get rid of all the water. You don't want rust forming.
Click Here to Continue to Page 4 of DX Hybrid Swap