_Click Here to Return to the Previous Page
This Swap is being performed in a 5th Gen 95 Civic DX coupe.
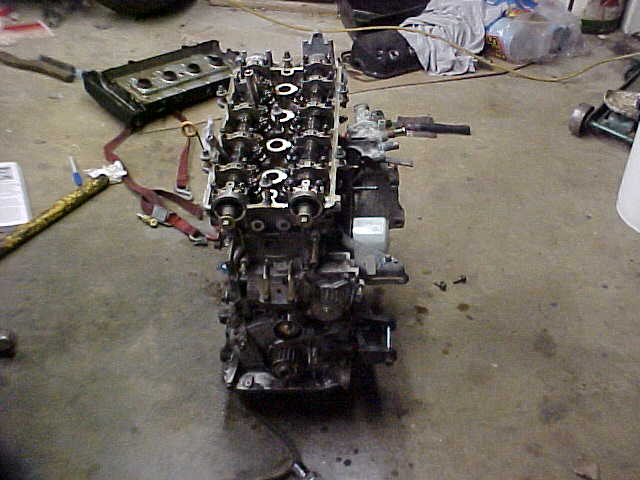
As a recap of page one, i unbolted everything from the engine to get ready to tear the block down
The first step to getting inside the motor is to remove the valve cover. This is a simple process. By removing
the nuts on the top of the valve cover, to get the valve cover loose use a flat head screw driver. After getting the
cover off make sure to take the rubber gromits out so you don't loose them.
Once the valve cover is off the next step is to remove the timing belt , camshafts, and cam gears. To remove the timing
chain you will need to unbolt the timing belt covers on the side of the engine. There is a upper, mid, and lower cover
for the timing cover. Each peice is held on with approximatly 2 bolts each. The first cover you remove is the top one. The
next step is removing the underdrive pulleys (crank, alternator pulleys) To remove the pulleys you will need something to
hold the pulleys from turning while you put a socket on a breaker bar to get the nut loose. Also the nut on the pulleys IS NOT
reverse threads. When you get the Pulleys off now you can remove the lower and middle timing belt covers. With the covers
off you now have complete access to the timing belt and the timing belt tensioner bolt. Loosen this bolt about 1/2 a turn, using
your hand push the tensioner away from the belt causing it to get some slack in the belt.. Now tighten the bolt back up so it stays
loose. If you plan on re-using your timing belt then mark a arrow in the direction the belt is going. In my case i'm replacing it. Now
it's time to remove the cam gears. Use a large screwdriver to put in the gears so you can loosen the nut without spinning the cam's.
Once you slide off the gear you will notice a waldroff's spacer. Make sure to save both spacers for re-install.
With the cam gears off, it's now time to start unbolting the camshafts. Start in the center of the cam by turning each bolt about 1/4 turn to
relieve the spring tension on the cams. After you get them loose you can take them off. Now pull the cams out of the head. You may
need a rubber mallat to get the cam seats to break loose. Be carefull not to drop the rocker arms out of the head. As they just sit in there.
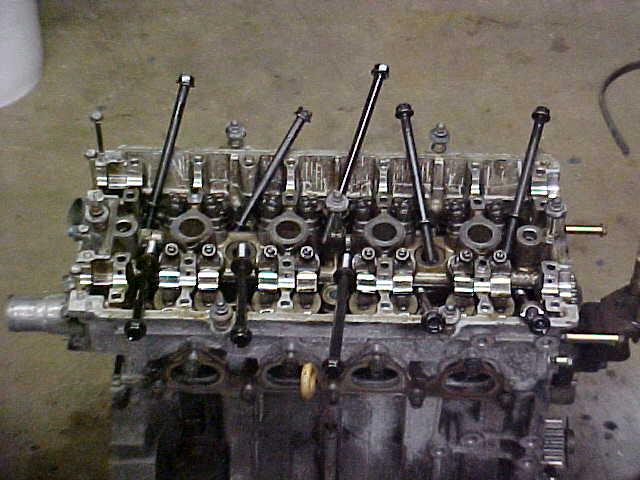
Now it's time to start unbolting the head. Follow this Bolt pattern shown in the image below to loosen the bolts holding the head on.
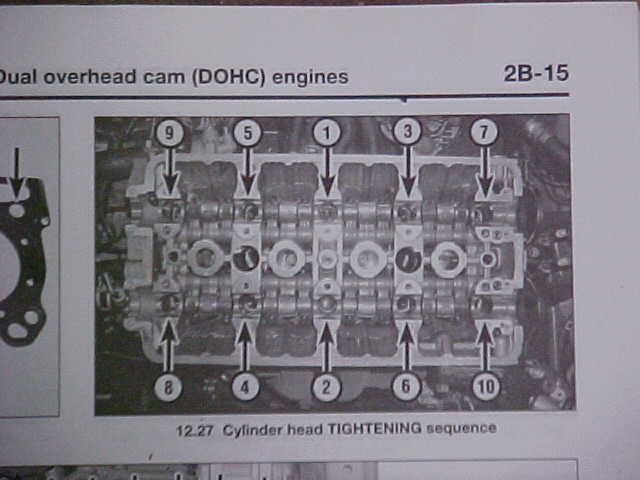
Now that you have unbolted the head don't be in to much of a rush now. Don't just pluck those bolts out of the cylinder head. It's important
that the bolts all get put back in the same pattern they came out. Get yourself a roll of masking tape and wrap a peice around each bolt
then number each bolt as they are shown in the image above. Here is how the head should look when you have the bolts out. As you
can see i havn't numbered my bolts yet in this image.
Ok it's now time to slide the head off of the block. If you have all the bolts removed and lift straight up on the head it should slide right off
with little to no problems. But there is always a chance that the gasket may have gotten stuck. So if it does use a rubber mallat and lightly
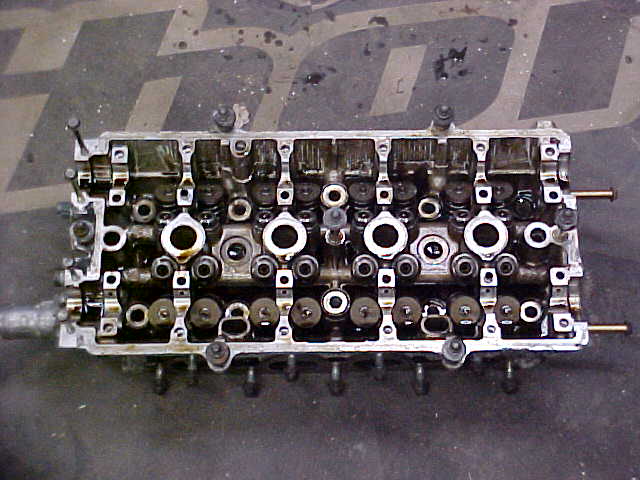
tap on the cylinder walls to try and break it loose. Once you get the head off the block be carefull not to knock out the rocker arms from the
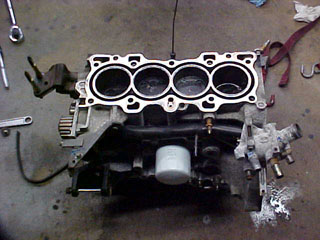
top of the head. Remeber they just sit in there! Set the head someplace safe for now. In the picture below you will notice my rocker arms
have been taken out of the head. Because i'm replacing them! In your situation it might be different.
You can now see the pistons sitting in the block, inspect your cylinder walls for any damage or scrapes. If it doesn't
look awfull you should be fine. Only thing i reccomend doing at this point would be to hone the cylinder walls before
installing any new pistons/rings. To remove the pistons you will need to turn the engine upside down and start unbolting
the oil pan. There are several bolts on the bottom of the pan that hold it on. Make sure you have already DRAINED your
engine oil at this point!

I'll be updating this section frequently. The
next update will include all information after removing
the oil pan to removing the crank, pistons/rings.
And re-installing the new ones after honing the cylinders.
I also forgot to mention that i cleaned the Engine
up some after the last step on page 1. Which was unbolting
everything from the block. I used Engine Degreaser
and Castrol Super Clean and a tooth brush to remove
alot of gunk. It's still not perfectly clean but better
then it was. I'll be putting it in a acid dip once
i get the block all the way stripped. All i did was
spray the degreaser on the engine and spray it off
with my pressure washer. I wasn't worried about water
entering the intakes or exhaust ports because i was
stripping the motor down anyhow and could dry it out.
If you wash your engine in this manner it's also a
good idea to spray everything down with WD-40 to prevent
any rust from forming.
Click Here to Continue to Page 3 of DX Hybrid Swap